
You are using an out of date browser. It may not display this or other websites correctly.
You should upgrade or use an alternative browser.
You should upgrade or use an alternative browser.
1996 Warrior Project
- Thread starter Warrior1996
- Start date


Help Support Yamaha Raptor 350 & Warrior Forum:
This site may earn a commission from merchant affiliate
links, including eBay, Amazon, and others.
Warrior1996
Well-Known Member
Thanks man, more to come when the funds are available lol
Warrior1996
Well-Known Member
Well I'm on spring break this week so there's no better time to wrench on the warrior. Been thinking about a long travel rear linkage for a while now, especially when I got the 660 shock on and saw the chain binding issue. So over the weekend I dropped the quad by taking all the shocks off and started to work on measuring up the LT linkage. Was hoping to be able to use parts off the raptor 350 linkage, but there are several issue with this. Not only will the shock hit the stock airbox when compressed, the extended and compressed lengths needed for the 660 shock do not line up. So yeah, time for some custom fabrication. Made a linkage out of cardboard today that should give me the correct extended and compressed lengths and also allow the shock to clear the airbox (maybe).
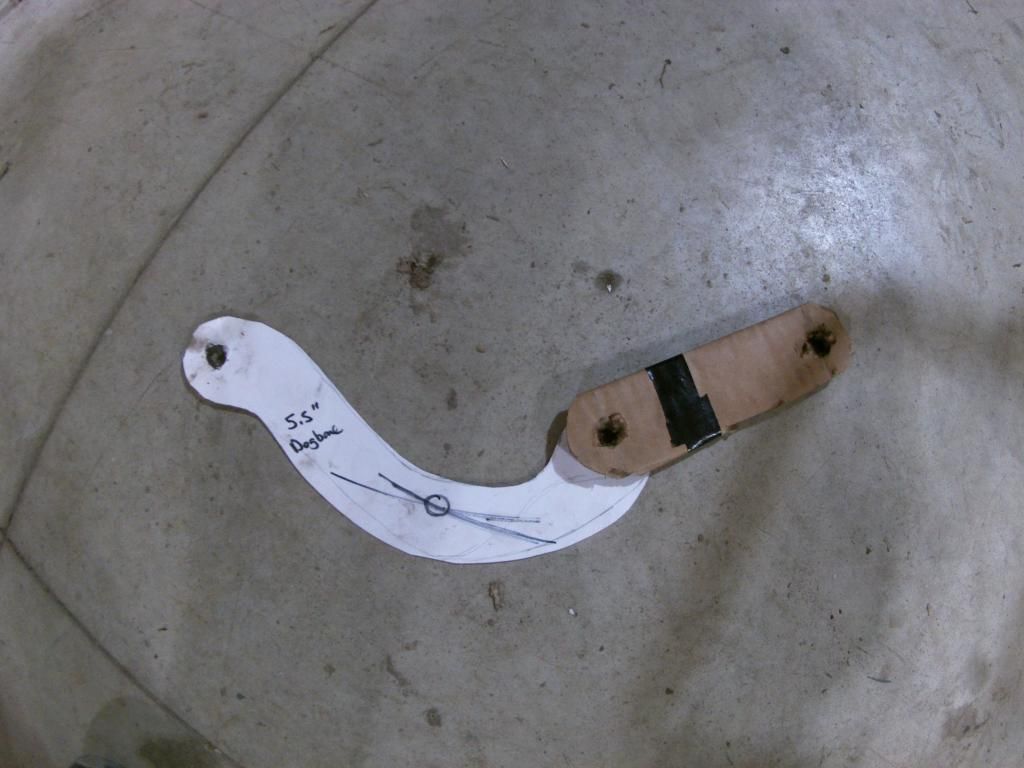
So after many attempts with different length dogbones and links, I came to this design. I'm not done with the design work at all, but this is what it will look similar to. The white cardboard mounts to the swingarm and the brown goes to the frame. The brown "dogbone" is 5.5" eye to eye, like it says. Here's some pics with it on.
At Full Extension
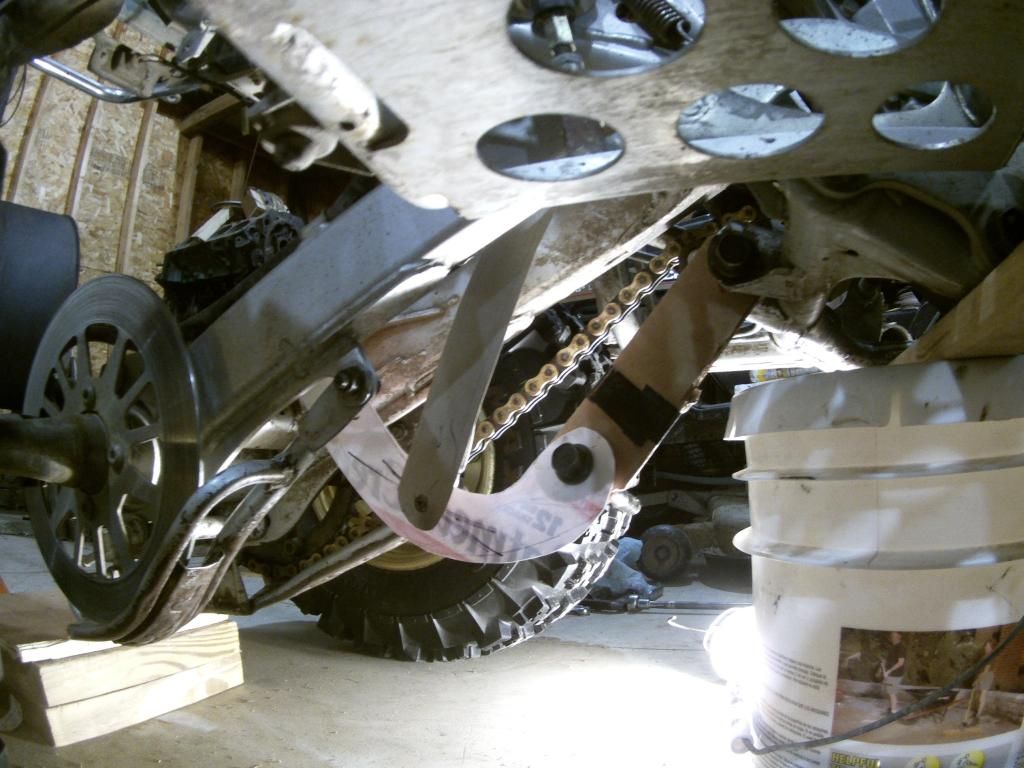
At Full Compression
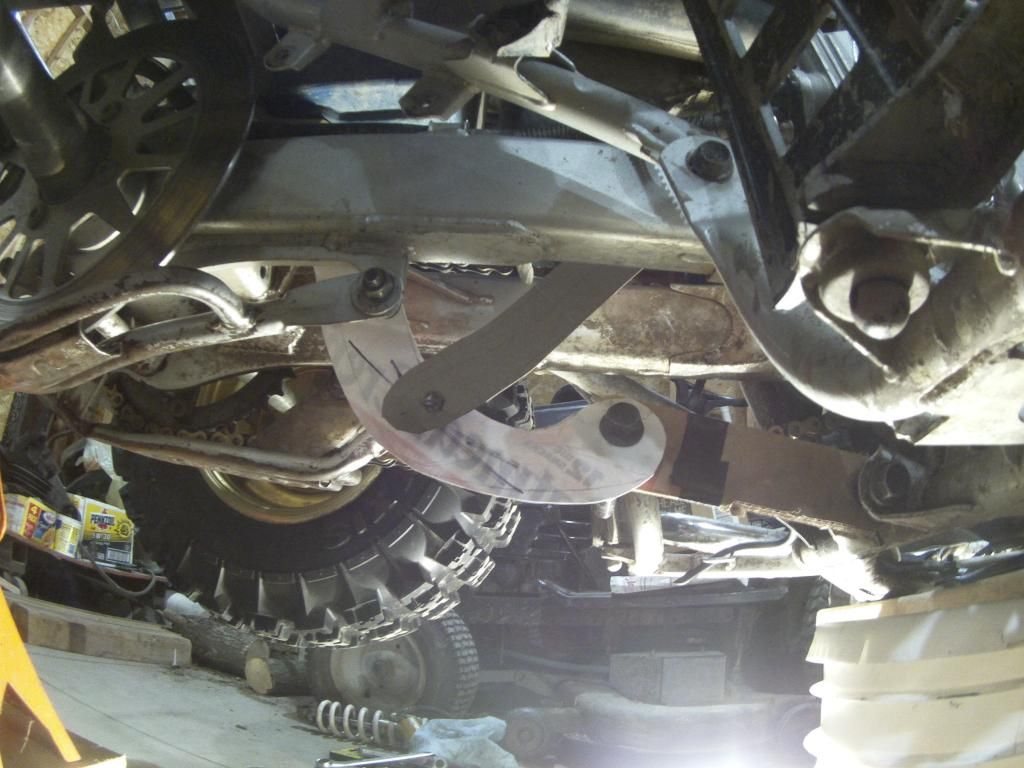
And for those who are wondering what a fully compressed swingarm on a warrior looks like, here you go.
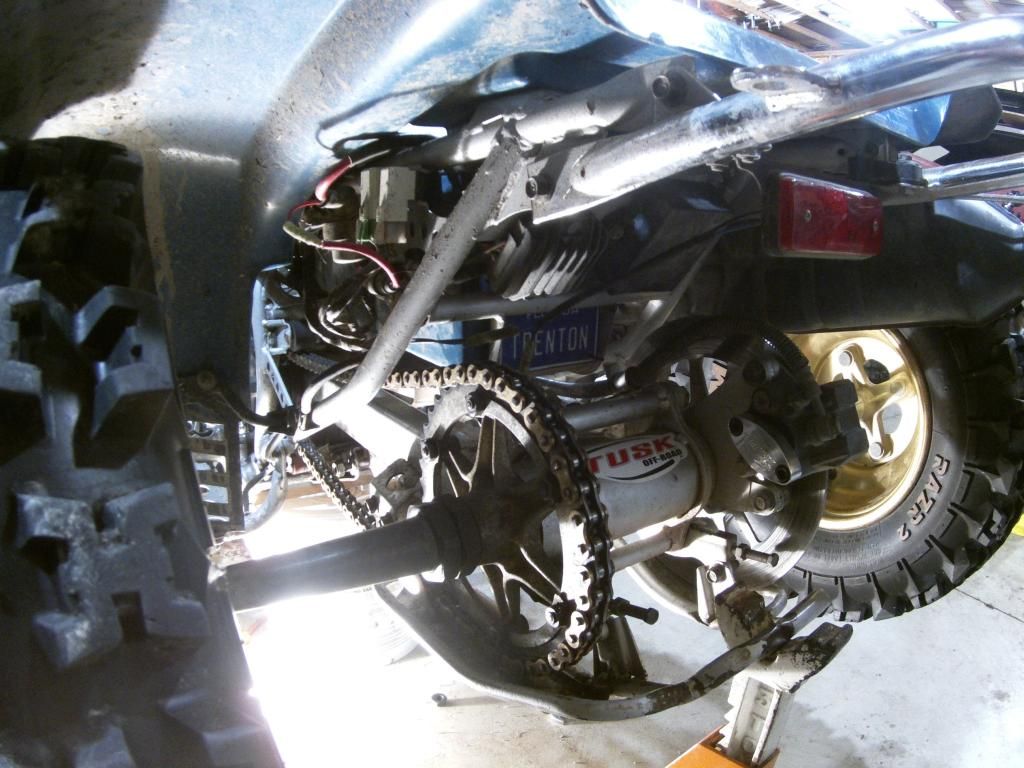

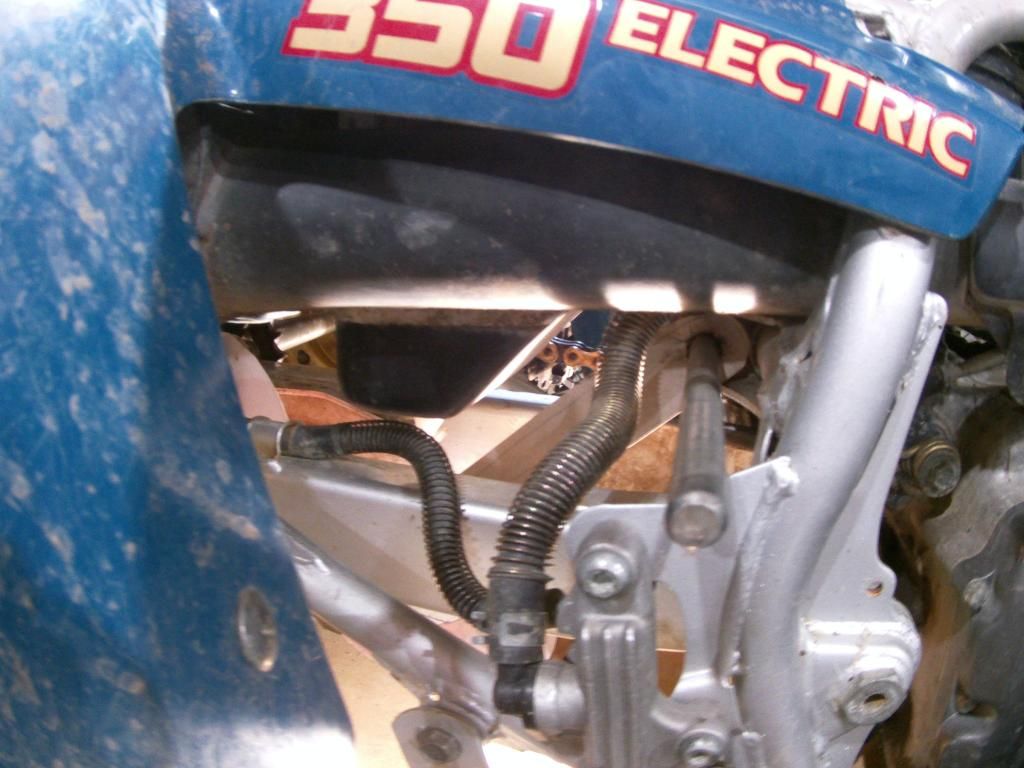
Also, shock clearance to airbox. The shock is represented by the cardboard strip. This is at full compression. On a side note, those looking to run a stock warrior airbox and raptor 350 linkage, your shock will most likely hit the airbox at full compression, so modification will be required.
Another mod I have been dreaming up is a hump seat, so here are some pics of a cardboard one lol.
So, yeah, this is going to be my spring break lol. Hopefully will make a linkage out of wood or steel soon so I can run the bike through the travel with a shock on it (no spring). With this setup, I will be able to have the full ~4.375" of shock stroke from the 660 rear shock but at the same time having ~7.75" of rear wheel travel, which is close to stock for a warrior. This means no chain binding, but still a smooth ride from the 660 shock. I still have to calculate progression rate for the rear, as this will also have a say in the length of each component of the linkage. Please leave any feedback you guys have or point out anything I should consider, as I don't want to miss anything important.

So after many attempts with different length dogbones and links, I came to this design. I'm not done with the design work at all, but this is what it will look similar to. The white cardboard mounts to the swingarm and the brown goes to the frame. The brown "dogbone" is 5.5" eye to eye, like it says. Here's some pics with it on.
At Full Extension

At Full Compression

And for those who are wondering what a fully compressed swingarm on a warrior looks like, here you go.


Also, shock clearance to airbox. The shock is represented by the cardboard strip. This is at full compression. On a side note, those looking to run a stock warrior airbox and raptor 350 linkage, your shock will most likely hit the airbox at full compression, so modification will be required.

Another mod I have been dreaming up is a hump seat, so here are some pics of a cardboard one lol.


So, yeah, this is going to be my spring break lol. Hopefully will make a linkage out of wood or steel soon so I can run the bike through the travel with a shock on it (no spring). With this setup, I will be able to have the full ~4.375" of shock stroke from the 660 rear shock but at the same time having ~7.75" of rear wheel travel, which is close to stock for a warrior. This means no chain binding, but still a smooth ride from the 660 shock. I still have to calculate progression rate for the rear, as this will also have a say in the length of each component of the linkage. Please leave any feedback you guys have or point out anything I should consider, as I don't want to miss anything important.
Last edited:
The mark up you have on the linkage,,extended&compressed pics,,with the set you have with the dog bone being in front of the cradle, wouldnt that one cause excessive play during loaded travel and if you catch a rock/log with would it not shove the cradle upward... Just throwing ideas around,,not knocking you.. But i belive thats the reason the factory set up has the cradle in front and dog bone in rear,,that way when bottomed out on obstetrical it will still stay solid and act as a skid. im not expert in any way but have 13yrs in suspension setup on baja truck,crawlers and mx. Like i said just throwing in my 2cents, not knocking you.
Like for instance if you caught a hard object at the point were you have the electrical tape..
Like for instance if you caught a hard object at the point were you have the electrical tape..
Last edited:
Warrior1996
Well-Known Member
Look at the raptor 350 linkage I have pics of it if you scroll up more in my thread. The setup is the same with the dogbone in front. I understand what you are saying, but the chance for that to happen would be low to zero (I would think) since the frame is somewhat blocking it.
Ok, i see. were i ride its all about building to hit obstacles wither you want to or not lol.. People is constantly tearing suspension and busting motors here. I was just in that mind set when looking at it. Hope ya get it whopped while on break, cant wait to see her finished.
Warrior1996
Well-Known Member
Yeah, thanks for the advice tho, will keep that in mind while design is taking place.
just my way of doing it,,,i would mock it up out of something a bit stronger like 1/8th or 1/4 sheet of aluminum/steel and install shock without spring. work it through travel and check for unwanted binding and play. I know your going off the raptors design but changing something just a fraction can cause huge out comes on suspension. not saying you dont know anything, heck you may know more than me for all i know.just looking at it at different angles so you are golden when you make final product and dont run into problems and have to throw away all that money,, materials aint cheap here so testing is a huge must for us. i am going to stay ontop of this with you if you dont mind, itll be a learning for us both.
if it wasnt for the dang airbox on warriors it wouldnt be as bad i believe lol.. im building mine for street and everything i try wants to put the shock in the airbox,,finally said screw it and going shorter on the shock.
Warrior1996
Well-Known Member
Said that almost word for word in the last section of text in my original post lol. And yes, if the airbox wasn't in the way, it would be MUCH easier.just my way of doing it,,,i would mock it up out of something a bit stronger like 1/8th or 1/4 sheet of aluminum/steel and install shock without spring. work it through travel and check for unwanted binding and play. I know your going off the raptors design but changing something just a fraction can cause huge out comes on suspension. not saying you dont know anything, heck you may know more than me for all i know.just looking at it at different angles so you are golden when you make final product and dont run into problems and have to throw away all that money,, materials aint cheap here so testing is a huge must for us. i am going to stay ontop of this with you if you dont mind, itll be a learning for us both.
Warrior1996
Well-Known Member
Haha, I understand man
Warrior1996
Well-Known Member
I have access to a machine shop at my college and also a full machine shop my dad runs. I can get materials, and we have a bunch of steel at home too. Only thing I don't have is a plasma cutter lol. Thanks for the offer though.
Warrior1996
Well-Known Member
Was just doing some more research on the linkage. Since trx450r's use a similarly shaped linkage, figured I'd look at it. Turns out the Elka ProDual Long Travel linkage for the trx450r's looks remarkably similar to my design. Now remember, I didn't look at this picture prior to designing mine lol. Here's the pics for comparison.
Elka ProDual LT
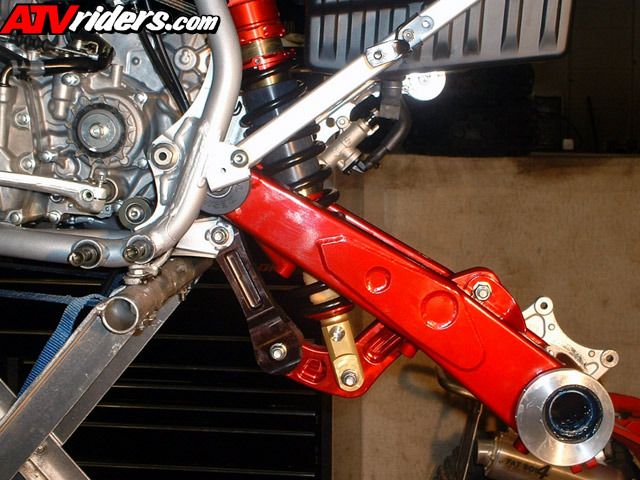
My LT Warrior Linkage
Elka ProDual LT

My LT Warrior Linkage
Warrior1996
Well-Known Member
Thanks Jimmy and ADV TED
Looking good, very similar to my preliminary designs.