head porting

Yamaha Raptor 350 & Warrior Forum

Help Support Yamaha Raptor 350 & Warrior Forum:

This site may earn a commission from merchant affiliate links, including eBay, Amazon, and others.

coryv4

Well-Known Member
Joined
Oct 13, 2011
Messages
111
Reaction score
0
Location
essexville mi
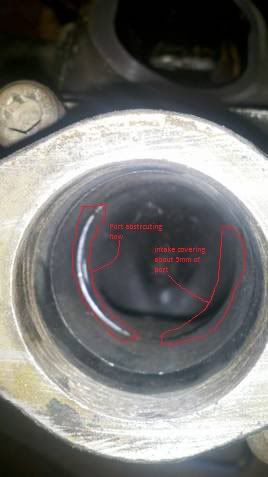
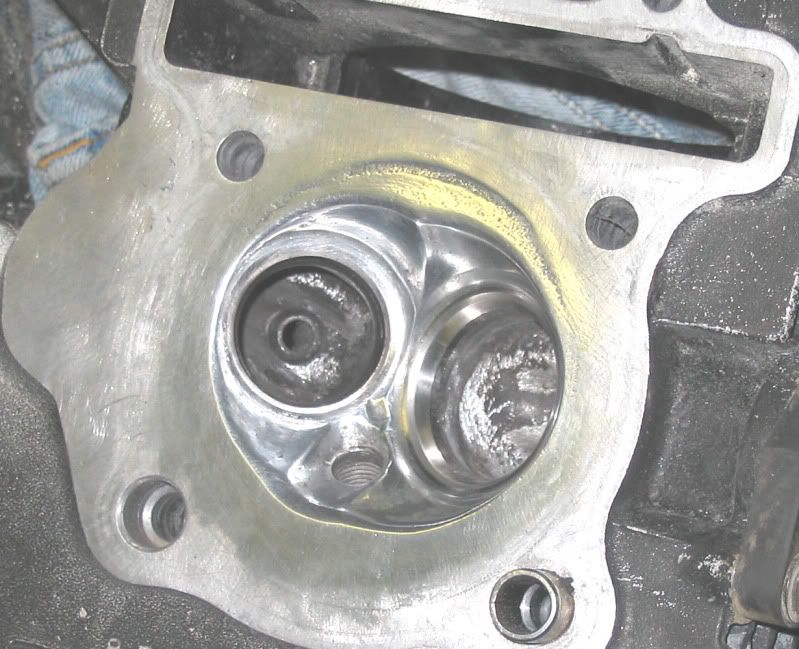
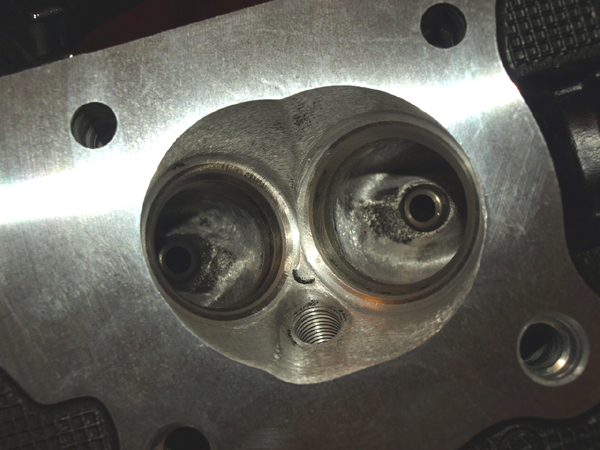
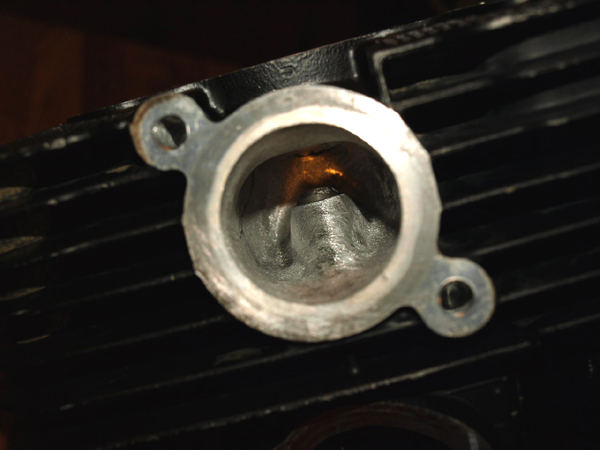
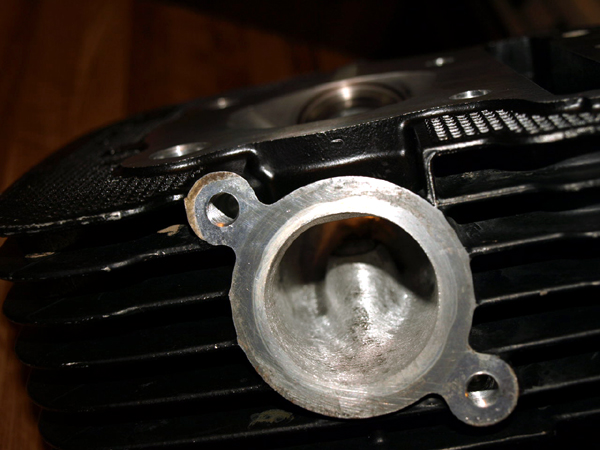
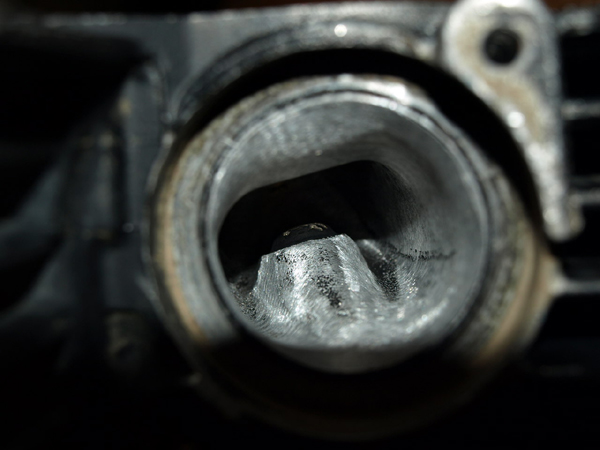
Ok today i am going to be porting my warrior head there are a few things ive noticed as flaws in the intake manifold its not centered. i am going to smooth the exhaust to the best my tools will allow me to next i am going to clean the carbon out of the intake and use a 80grit stone and ruff it up at low speed and run a 320 sand stone in the valve pocket to smooth that out
tn.jpg
 
I think 80 grit is what we use at our shop for the intake work when we do it. I actually use a Makita die grinder with 1/4" shank. I think it spins a 25,000 RPM. Have to use an air die grinder for the cartridge rolls because the Makita just makes them explode after a little heat gets to them. You should be able to blend that off center area straight down without hurting anything. Just make a nice sweeping radius going to the runner.
 
I think 80 grit is what we use at our shop for the intake work when we do it. I actually use a Makita die grinder with 1/4" shank. I think it spins a 25,000 RPM. Have to use an air die grinder for the cartridge rolls because the Makita just makes them explode after a little heat gets to them. You should be able to blend that off center area straight down without hurting anything. Just make a nice sweeping radius going to the runner.
i am using a low speed micro die and it coming along nicly excpet were the valve slot is i am having trouble getting in the really small pockets
 
On mine I just hit the highs and rough areas. There are some low spots I didn't hit. As long as the contour of the overall runner is blended smooth, some of the low areas that can't be reached should be fine. If I think about it, I will post some pics of mine this evening. I am not done yet as I need to polish the exhaust runner and chamber a little more.
 
On mine I just hit the highs and rough areas. There are some low spots I didn't hit. As long as the contour of the overall runner is blended smooth, some of the low areas that can't be reached should be fine. If I think about it, I will post some pics of mine this evening. I am not done yet as I need to polish the exhaust runner and chamber a little more.
on the intake i am going to leave the swirls the sand leaves behind to blend the air and fuel better on the exhaust i have gotten all the carbon out and i am hand sanding it smooth with 600grit wet sand
 
also this warrior dropped a valve last year and i had to have .006 off the head is that to low of a squish?
 
I don't think .006 will hurt anything. I cut .003 off mine. The only reason I did that was I slipped with the cartridge roll. Needless to say I tape the surface now while grinding.
 
I don't think .006 will hurt anything. I cut .003 off mine. The only reason I did that was I slipped with the cartridge roll. Needless to say I tape the surface now while grinding.
yeh i had to have .006 tanken off i dont even no if this is gonna run ihas some serious pits in it
 
You'll be surprised what will run, trust me. As far as quench is concerned it doesn't exactly work like you think. Quench is the area between the base of the head & the flat of the piston, it can be altered by gasket thickness or milling the deck of the jug but not the base of the head. Basically, you've bumped the compression a tiddy bit & given yourself a better mating surface to seal against. Get yourself some spray on copper sealer, & use it on the head gasket & that will help also.
 
You'll be surprised what will run, trust me. As far as quench is concerned it doesn't exactly work like you think. Quench is the area between the base of the head & the flat of the piston, it can be altered by gasket thickness or milling the deck of the jug but not the base of the head. Basically, you've bumped the compression a tiddy bit & given yourself a better mating surface to seal against. Get yourself some spray on copper sealer, & use it on the head gasket & that will help also.
i am no 4 stroke expert i no exactly how squish area and combustion chamber displacment works on 2 stroke but not so much 4 stroke
 
Not saying it's right, but I used a rotary file on an air die grinder. Cuts like hot butter even at slow speeds. I wasn't after total perfection, just wanted to smooth them out some. Mainly cut both valve guide bosses down to the metal guides, and smoothed the seat-to-bowl transition. Didn't worry much about the nooks 'n crannies. Hand sanded the exhaust runner down to 220 grit. Polished the chamber with sandpaper, then a dremel cotton wheel and DuPont rubbing compound. Decked the gasket surface on a large glass plate from 80 down to 400 grit paper (not shown).
chamber.jpg
 
The Warrior head doesn't have much of a quench area. Not like what I am used to seeing on automotive engines, anyway.

Here is the start of the work on my head. Haven't decided if I am going +1 on the intake so haven't really finished it. Going to have to put some tape on the surface since I got ahead of myself surfacing it.

warrior_chamber.jpg

int_port.jpg

int_port_01.jpg

exh_port.jpg
 
I'd say on the Warrior the .040 rule is just so things stretching and piston rock keep the piston from wacking the head. The quench area is probably .125" or so at its widest. With the valve arrangement and a dome piston it is almost a hemi!!
 
Exactly, I'm actually going to see if I can get by on less quench than the .040, these engines need all the help they can get. I did a lil reading on hemi chambers a while back & realized that it's not the greatest design, not that it's exactly the same but I discovered that the old Chrysler Hemi required alot of ignition timing & was usually tempermental when it got on the edge of too much timing by just a degree or 2.
 
Some of my boss's friends were racing Hemi's in their dragster. Had a lot of trouble with them and have since gone back to big block Chevy based engines. All aftermarket stuff of course.

I haven't done a lot with the Warrior stuff, but my co-worker has a flow bench. When I decide if I am going +1 on the intake side, I may do some flow testing just for kicks. Probably should have done some before I did the port blending so I would have a reference.
 
You know you wanna do the +1! Just bite the bullet & do it, lol! I'd love to see those #'s.
Probably will. It is a winter project and depends on if I can round up some mad money to get it done. I have to buy a crank, piston, and lots of little stuff. Head will probably be the last thing I work on.
 
Back
Top